

Indulge in delectable and gooey chocolate lava cookies filled with a melt-in-your-mouth center. These irresistible treats feature a crisp exterior and a warm, oozing chocolate center.
Who can resist the combination of a crunchy outer layer and a luxuriously soft inside? These cookies are the ultimate dessert for any chocolate lover. The rich, velvety oozing chocolate paired with the perfect cookie texture creates a mouthwatering experience.
Whether you’re looking to satisfy a sweet craving or impress guests at your next gathering, chocolate lava cookies are sure to delight. Perfect for any occasion, these decadent treats are easy to make and guaranteed to be a hit. Whether enjoyed alone or topped with a scoop of vanilla ice cream, chocolate lava cookies are a delightful indulgence for all ages.
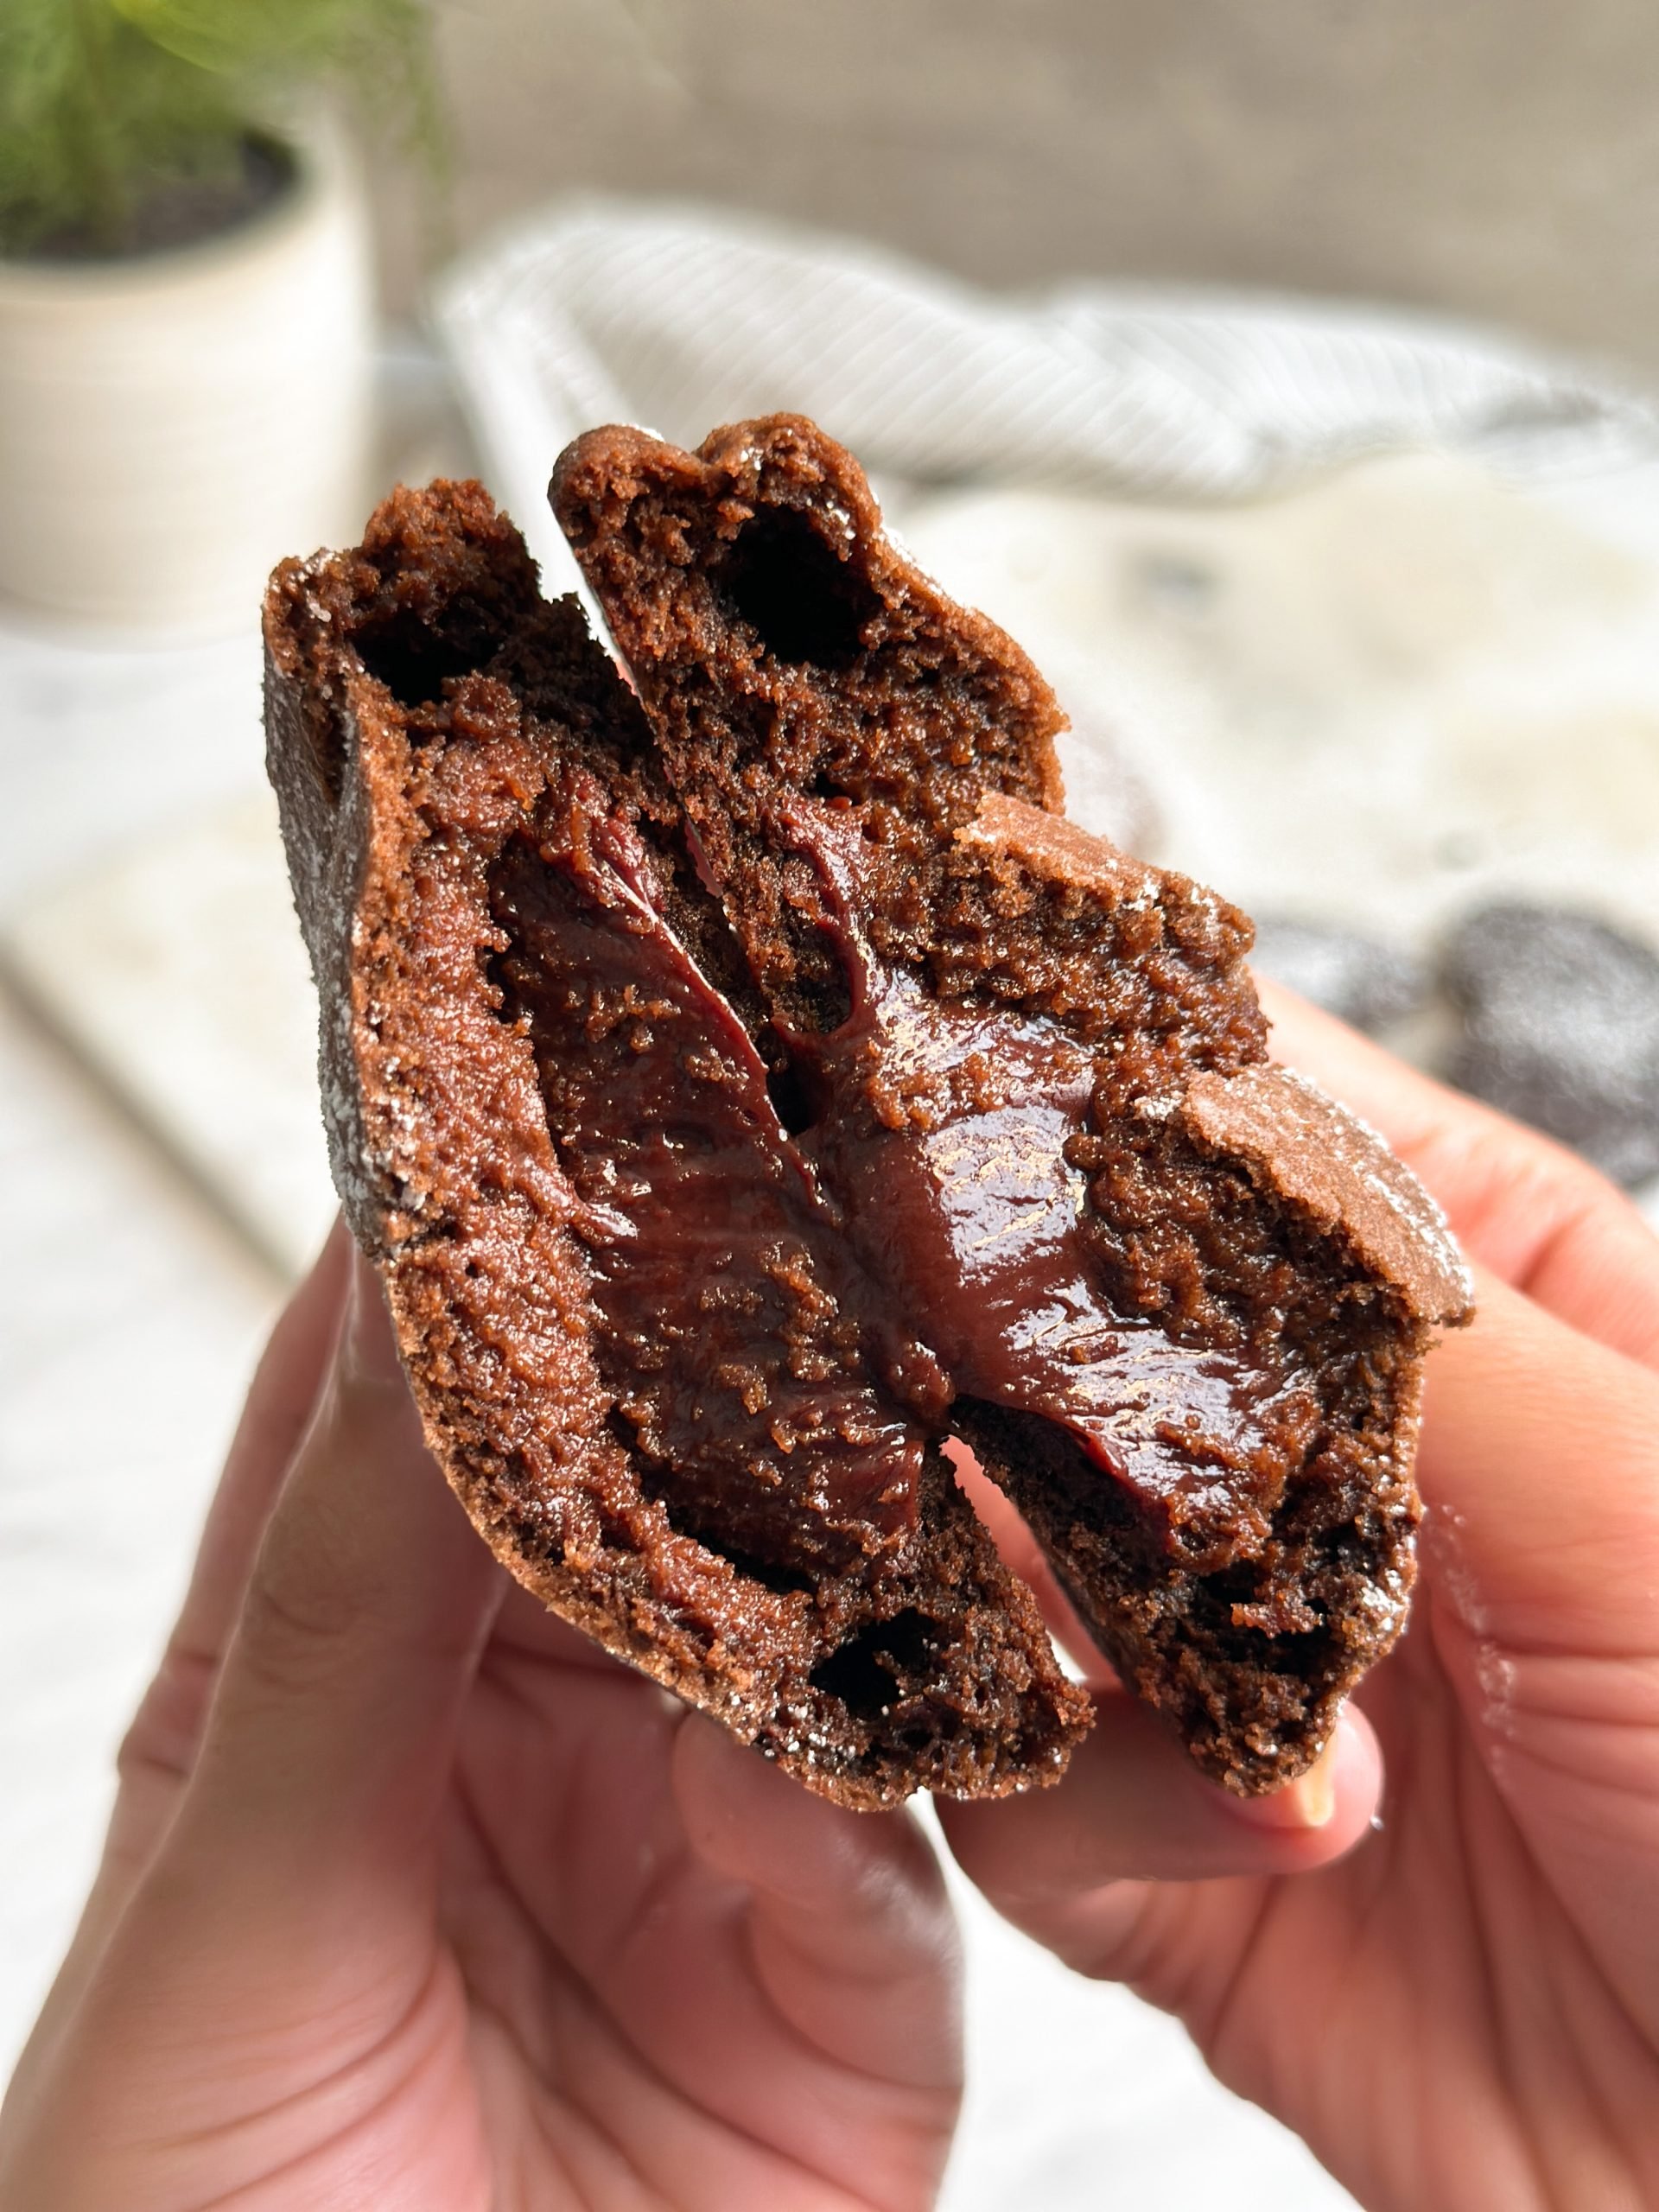
Credit: bakewithzoha.com
The History Of Chocolate Lava Cookies
The irresistible combination of warm, molten chocolate surrounded by a soft and chewy cookie shell has made Chocolate Lava Cookies a favorite dessert for chocolate lovers worldwide. But have you ever wondered about the origin of this delectable treat? In this post, we’ll delve into the fascinating history of Chocolate Lava Cookies, tracing their roots from the invention of Chocolate Lava Cakes to the adaptation of the recipe to create the beloved cookies we know today.
The Invention Of Chocolate Lava Cakes
The story of Chocolate Lava Cookies begins with the invention of Chocolate Lava Cakes. The credit for this decadent creation goes to the renowned French chef Jean-Georges Vongerichten. Back in the 1980s, while experimenting with a classic chocolate cake recipe, he accidentally underbaked the center, resulting in a moist and gooey interior.
Recognizing the novelty of his culinary mishap, Vongerichten quickly realized that he had stumbled upon something extraordinary. The molten chocolate center, surrounded by a delicate cake crust, created a delightful contrast of textures and flavors that took the dessert world by storm.
Adapting The Recipe To Create Chocolate Lava Cookies
With the success of Chocolate Lava Cakes, it was only a matter of time before someone tried to recreate this indulgent experience in cookie form. The adaptation of the recipe to create Chocolate Lava Cookies is a testament to the ingenuity and creativity of bakers.
To transform the cake into a cookie, several modifications were made. The batter had to be adjusted to achieve a thicker consistency, allowing it to hold its shape while baking. Additionally, the baking time needed to be reduced to ensure that the center remained gooey and molten. The result was a cookie that had the same luscious, lava-like chocolate filling but in a more portable and snackable form.
Today, Chocolate Lava Cookies have become an obsession for chocolate enthusiasts, offering the perfect blend of textures and flavors. Whether enjoyed warm straight from the oven or paired with a scoop of vanilla ice cream, these cookies are a true delight for anyone with a sweet tooth.
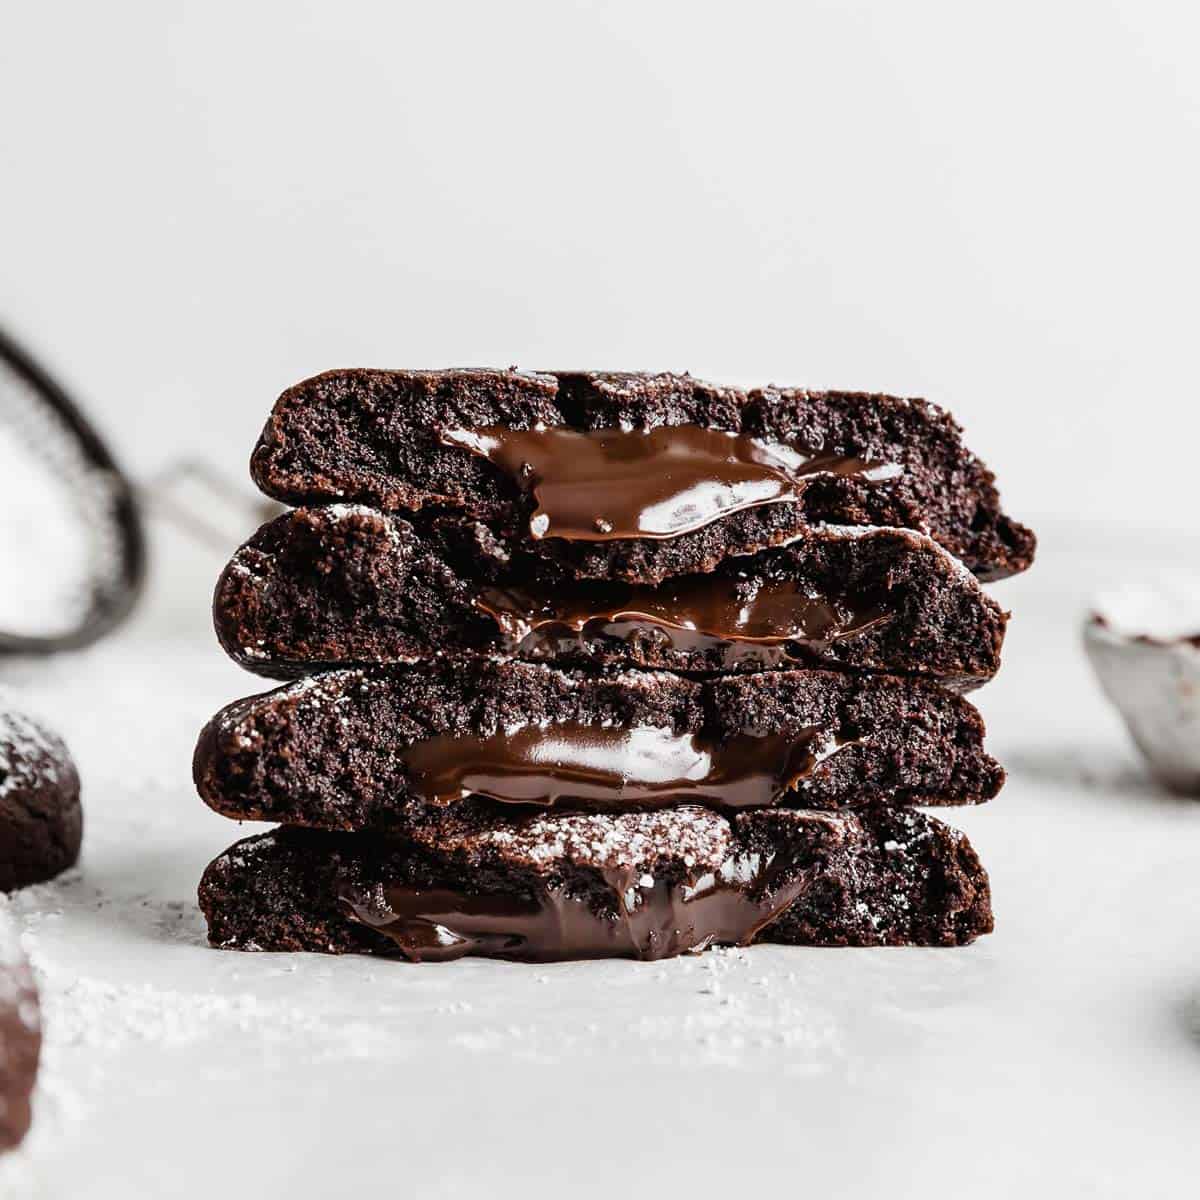
Credit: saltandbaker.com
Ingredients Needed For Chocolate Lava Cookies
Chocolate lava cookies are a delectable treat that combines the richness of chocolate with a gooey, molten center. To create this mouthwatering dessert, you will need a few key ingredients to bring out the perfect balance of flavors and textures. Let’s delve into the essential components required to craft these indulgent chocolatey delights.
Chocolate
Chocolate is the star ingredient in creating the luscious, molten center of a chocolate lava cookie. High-quality semisweet chocolate will provide the perfect level of sweetness and richness, ensuring a satisfying, gooey consistency when the cookie is baked to perfection. Melted chocolate is what gives the cookies their signature lava flow, so it’s crucial to choose a chocolate that will melt smoothly.
Butter
Butter serves as the foundation for the cookie batter, imparting a rich, buttery flavor and contributing to the overall tenderness of the cookies. It also plays a critical role in achieving the desired consistency, ensuring that the cookies maintain their shape while still allowing the molten chocolate center to ooze out invitingly.
Eggs
Eggs act as a binding agent in the cookie dough, helping to hold everything together while adding moisture and richness to the mixture. They contribute to the tenderness and structure of the cookie, while also aiding in achieving the perfect texture for the molten center to develop during baking.
Sugar
Sugar not only sweetens the cookies but also plays a crucial role in creating the irresistible crackly exterior. The right balance of sugar is essential to achieve the desired contrast between the crisp outer layer and the decadently soft, melting interior of the cookies.
Flour
Flour provides the necessary structure for the cookies, ensuring that the batter holds its shape during baking while still being soft and tender. It also contributes to the overall texture of the cookies and is crucial in achieving the perfect balance between the firm outer crust and the delectably gooey center.
Step-by-step Guide To Making Chocolate Lava Cookies
Are you ready to indulge in a decadent treat that oozes with rich, gooey goodness? Look no further than the irresistible allure of Chocolate Lava Cookies! With a soft, velvety exterior and a molten chocolate center, these cookies are a dessert lover’s dream come true. In this step-by-step guide, we’ll walk you through the process of creating your own batch of these heavenly delights.
Preparing The Chocolate
First, ensure you have high-quality dark chocolate on hand. Chop the chocolate into small pieces to facilitate even melting. This step is crucial for achieving that signature lava flow within the cookies.
Consider using a double boiler to melt the chocolate, or microwave it in short bursts, stirring frequently to prevent scorching.
Mixing The Batter
In a mixing bowl, combine the melted butter with brown sugar and granulated sugar. Whisk until the mixture is light and fluffy. Beat in the eggs and vanilla extract until well incorporated.
Gradually add the all-purpose flour, cocoa powder, and a pinch of salt, stirring just until the dry ingredients are fully integrated with the wet mixture. Be careful not to overmix, as this can result in tough cookies.
Baking The Cookies
Using a cookie scoop or a spoon, portion out the cookie dough onto a baking sheet lined with parchment paper. For a striking presentation, consider placing a few additional chocolate chunks on the surface of each dough mound.
Bake the cookies in a preheated oven for a precise amount of time. The goal is to achieve a slightly firm edge while maintaining a soft, gooey center. Timing is critical, as overbaking will lead to a loss of the coveted lava effect.
Checking For The Perfect Lava Center
After removing the cookies from the oven, allow them to cool for a brief moment before indulging in their warmth and richness. Breaking into one of these delectable treats should reveal a luscious, molten center that flows like liquid velvet.
Now that you’re armed with this step-by-step guide, you can embark on your journey to creating your own batch of Chocolate Lava Cookies. Get ready to delight your taste buds and impress your friends and family with this unforgettable dessert.
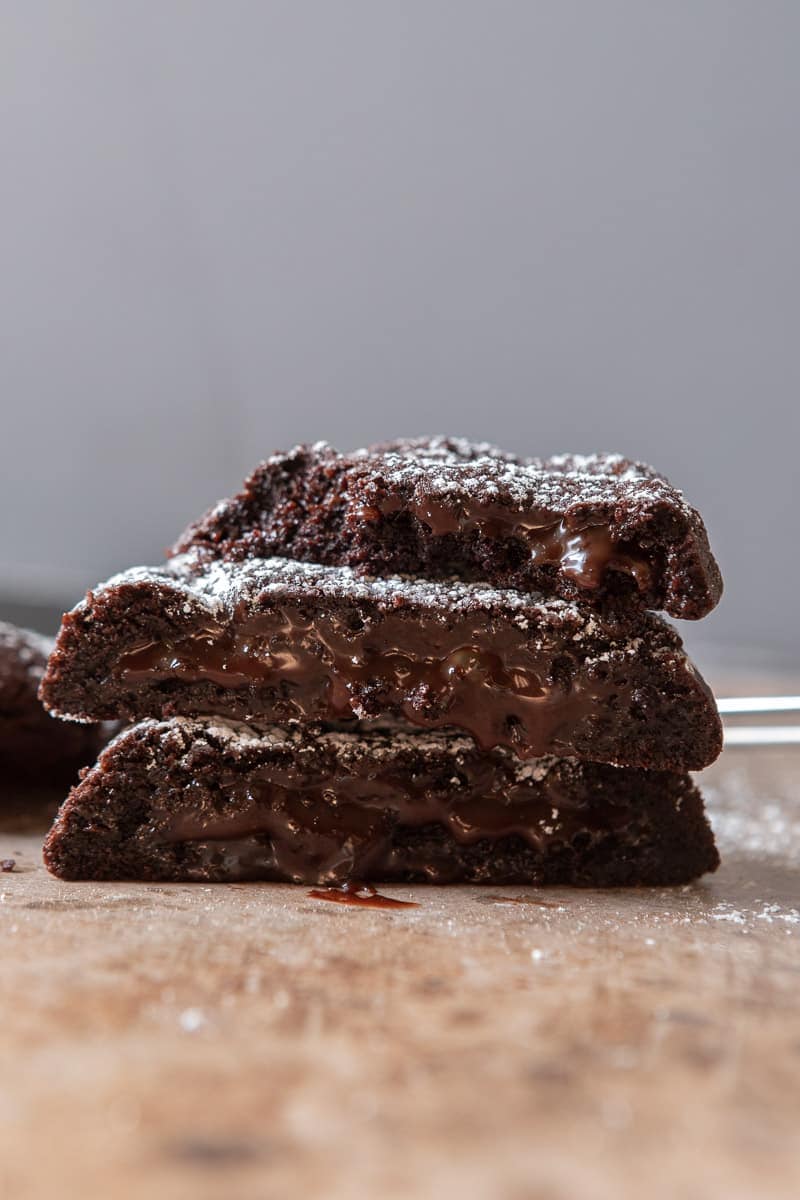
Credit: lifestyleofafoodie.com
Tips And Variations For Perfect Chocolate Lava Cookies
Creating the perfect Chocolate Lava Cookies can be a delightful adventure for any baking enthusiast. These rich, gooey treats are loved by both kids and adults alike. In this section, we will explore some helpful tips and variations that will elevate your Chocolate Lava Cookies to a whole new level. From adding different flavors to adjusting baking time for a desired lava consistency, and even serving suggestions – let’s dive right in!
Adding Different Flavors
Why stick to just plain chocolate when you can experiment with exciting flavors in your Chocolate Lava Cookies? By simply incorporating additional ingredients into the batter, you can create unique taste combinations that will surprise and impress your taste buds. Here are a few flavor suggestions and how to incorporate them:
| Flavor | How to Incorporate |
|---|---|
| Mint | Add a teaspoon of mint extract to the chocolate batter before baking. |
| Peanut Butter | Mix in a tablespoon of smooth peanut butter into the chocolate batter for a nutty twist. |
| Salted Caramel | Gently fold a tablespoon of salted caramel sauce into the chocolate batter for a sweet and salty delight. |
| Raspberry | Dollop a teaspoon of raspberry jam onto each cookie dough mound before baking. |
Adjusting Baking Time For Desired Lava Consistency
The perfect Chocolate Lava Cookie has a lava-like center that oozes out upon breaking the outer crust. The consistency of the lava can vary depending on personal preference. If you prefer a more molten and runny lava, reduce the baking time slightly. On the other hand, if you prefer a thicker and gooier lava, increase the baking time by a few minutes. Be sure to keep an eye on the cookies as they bake, as the timing can greatly impact the final result.
Serving Suggestions
While Chocolate Lava Cookies are delicious on their own, there are several ways to enhance the experience and impress your guests when serving them. Here are a few serving suggestions to consider:
- Serve the warm cookies with a scoop of vanilla ice cream for a heavenly dessert combination.
- Sprinkle some powdered sugar or cocoa powder on top of the cookies for an added touch of elegance.
- Pair the cookies with a cup of freshly brewed coffee or a glass of cold milk for a delightful snack.
- Create a cookie sandwich by spreading a layer of your favorite spread (such as Nutella or marshmallow fluff) between two cookies.
By following these tips and variations, you can make your Chocolate Lava Cookies truly irresistible. So, go ahead, get creative, and enjoy the process of baking these decadent treats!
Common Mistakes To Avoid When Making Chocolate Lava Cookies
When it comes to indulging in irresistible desserts, chocolate lava cookies rank high on the list. These gooey, chocolatey delights are a treat for the senses, with their rich flavor and molten centers. However, achieving the perfect lava cookie can be a tricky task. To help you avoid common pitfalls and ensure your next batch of chocolate lava cookies turns out flawless, here are some mistakes to steer clear of:
Overcooking The Cookies
Overcooking the cookies is a common mistake that can result in a dry texture rather than the desired gooey center. To achieve that perfect lava flow, it’s essential to bake the cookies for just the right amount of time. Too long in the oven and you risk losing the lava effect. The key here is to follow the recommended baking time and keep a close eye on them towards the end. Remember, slightly under-baking is better than over-baking when it comes to lava cookies.
Using Low-quality Chocolate
The quality of chocolate you use can make a world of difference in the taste and texture of your lava cookies. Opting for low-quality chocolate can result in a lackluster flavor and a subpar molten center. Investing in high-quality, dark chocolate with a high percentage of cocoa solids is crucial for achieving that luxurious and smooth lava texture. Don’t compromise on the star ingredient of your lava cookies.
Not Chilling The Dough
Chilling the dough is a crucial step that should not be overlooked. While it may seem tempting to skip this step and get your cookies in the oven faster, chilling the dough allows it to firm up and retain its shape during baking. This will help prevent the cookies from spreading too much and losing their lava-filled centers. So, be patient and give your dough the proper chilling time it needs.
Not Greasing The Baking Pan
Forgetting to grease the baking pan is a mistake that can lead to cookies sticking and breaking apart when you try to remove them. Greasing the pan with a thin coating of butter or using a non-stick baking mat ensures easy removal and beautiful, intact lava cookies. Don’t let your hard work go to waste – take a moment to grease the pan before spooning your cookie dough onto it.
In conclusion, making chocolate lava cookies requires careful attention to detail to achieve that coveted molten center. By avoiding these common mistakes of overcooking, using low-quality chocolate, not chilling the dough, and neglecting to grease the baking pan, you’ll be well on your way to creating decadent and indulgent lava cookies that will impress any dessert lover.
Frequently Asked Questions For Chocolate Lava Cookies
What Is A Chocolate Lava Cookie?
A chocolate lava cookie is a soft and gooey dessert that has a molten chocolate center. When you take a bite, the warm chocolate oozes out, creating a heavenly and indulgent treat.
How Do You Make Chocolate Lava Cookies?
To make chocolate lava cookies, you combine butter, sugar, eggs, flour, cocoa powder, and melted chocolate. The dough is then formed into balls, filled with a chocolate ganache, and baked until the edges are set but the center is still molten.
Can I Prepare The Dough In Advance?
Yes, you can prepare the dough in advance. After making the dough, wrap it tightly in plastic wrap and refrigerate for up to 24 hours. When ready to bake, let the dough sit at room temperature for a few minutes before shaping it into balls.
How Do I Get The Perfect Lava Center?
To achieve the perfect lava center, make sure to slightly underbake the cookies. Remove them from the oven while the center still appears slightly jiggly. Allow them to cool for a few minutes before gently transferring them to a serving plate to avoid breaking the delicate center.
Conclusion
Indulge in the irresistible decadence of chocolate lava cookies. These delectable treats offer a burst of rich, gooey goodness with every bite. Whether you’re a seasoned baker or just looking to satisfy your sweet tooth, these cookies are sure to impress.
With their easy-to-follow recipe and delightful taste, they are perfect for any occasion. So go ahead, spoil yourself and your loved ones with these heavenly delights. Happy baking!
